Fancy some pan-fried tofu bites smothered in a tangy hot sauce for snacking?
This scrumptious dish gets the crunchy top thanks to a nice rice flour coating. Asian style breading usually involves starchy flours like rice.
And the best part is:
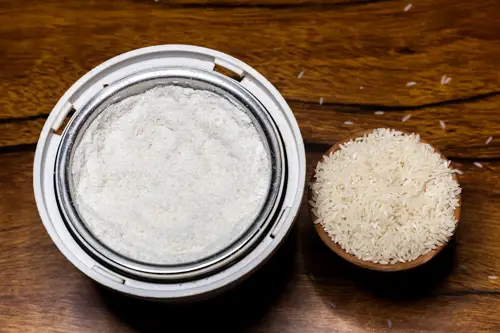
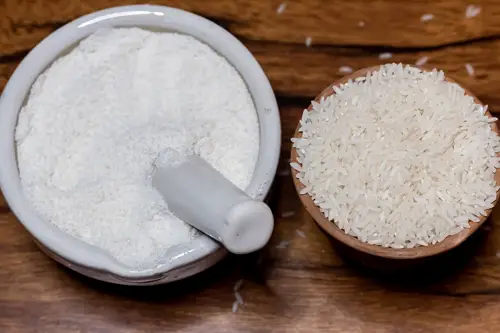
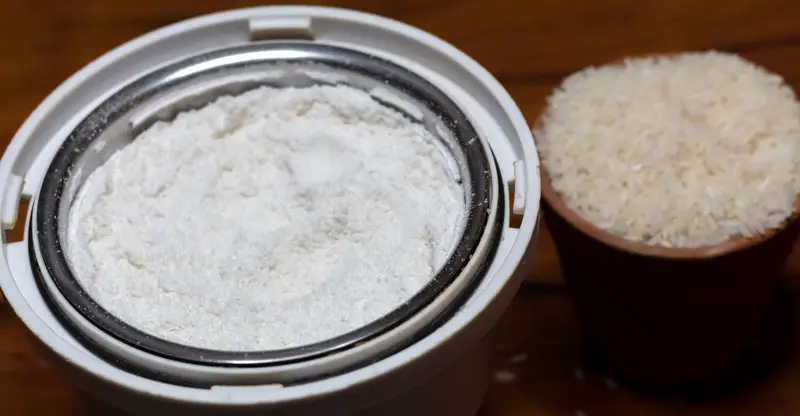
You can make rice flour at home without a blender!
If you love Thai, Korean, or Indian foods, you’ll find that rice flour is a must-have item in your pantry. You can use rice flour as a thickener, breading option, and as a flour addition to fried savories and even desserts.
Many Chinese and Japanese desserts like moon cakes, mochi and dumpling recipes require fresh rice flour as a main ingredient.
Are You Following a Gluten-Free Diet?
Use rice flour to make bread, cookies, or muffins. Make breakfast dishes like pancakes, tortilla, puddings, and crepes.
Should You Stock Up on Rice Flour?
Rice flour is now easily available in most grocery stores thanks to the popularity of Asian cuisines. But these can be often overpriced. You can never be sure about the quality or whether the manufacturer is using fillers to add weight.
And then, you’ll only need a few tablespoons or half a cup at the most if you’re making the occasional or weekly Asian or gluten-free recipe. Stocking up on a pound or more of rice flour doesn’t really make sense.
Can You Make Rice Flour at Home?
You can easily make rice flour at home. The blender is what most people use to grind rice grains into a coarse or super fine rice flour.
While this is a simple process, there are alternative methods you can use to make rice flour. Other options are always good to have, especially when you don’t have a blender or have one that is not up to the task.
This also allows you to make as much or as little rice flour you need. Some methods provide you with enough for a recipe that has it as a main ingredient. Other techniques allow you to make a few tablespoons for adding to soups and sauces or for use as breading and binding.
Benefits of Grinding Your Rice Flour
Rice flour is a wonderful baking alternative for anyone sensitive to gluten in wheat and related flours.
Grinding small amounts of rice flour at home is more economical than buying a big pack of rice flour you rarely use. You can use rice flour from whole grain rice to add more fiber and vitamins to your diet.
Brown and other colored rice are grains in their natural, unprocessed state. Like their whole grain counterparts, these provide more fiber, protein and other nutrients. They are also more suitable for the diabetic.
Do you have a Vitamix at home? See how it holds up against the Wolf Blender in our comparison article here.
What You Need to Know About Rice Varieties
First things first!
Not all rice is equal. The type of rice you use will depend on the type of recipe you’re following and the kind of flour you need.
White rice flour is the most common rice flour used. It is the refined cousin of all-purpose flour and comes from white rice, specifically short grain white rice.
Then you have brown rice which gives you a nuttier form of rice flour. You can make rice flour from red, black, or long grain fragrant rice like Basmati or Jasmine.
White rice flour is the flour standard for many Asian and gluten-free recipes. But the less processed the rice, the more nutrients it offers you in its flour version.
We haven’t forgotten glutinous rice, a type of short-grain rice. Careful not to confuse this concept with gluten in wheat. The glutinous here refers to the stickiness of the rice which is often called sweet rice or sticky rice.
While glutinous rice lends itself to sushi, noodles, and other recipes, the flour is used for specific purposes. Don’t swap sticky rice flour for white rice flour unless the recipe allows it. The texture is different and the subbing may not work well.
Alternate Ways to Grind Rice Flour
There are many ways you can make rice flour at home without the help of a high-speed blender. If you need alternative ways to grind rice flour at home, read on.
You can transform rice grain into fine flour or coarse powder with other pieces of kitchen equipment.
These include:
The one thing you’ve got to remember is that each method will give slightly different results. Some better than the blender and some a little more time consuming.
Basic Tools and Ingredients to Make Rice Flour
Whether you use the blender or the other methods we discuss in this article, these are extra tools you will need to make rice flour. Depending on the technique you may end up using one or more of these tools, but probably not all.
Baking sheet or large tray
Ingredients required:
Water
1 cup raw rice of choice
Related: What Is The Best Substitute If I Don’t Have A Food Processor?
Should You Soak Raw Rice Before Grinding?
You’re probably wondering why you need water to make rice flour.
The reasoning is simple. You need water to rinse the raw rice and remove all impurities and dirt from it.
Raw plant food like grains and beans also contain phytates which when ingested can disrupt your digestive system. This even causes stomach pain, flatulence, and discomfort in many people.
Soaking enables you to reduce this and make your food healthier and safer to consume.
The secret to making fluffy and fine rice flour lies in the prepping. You need to soak the raw rice for a few hours, dry it completely, and then grind it.
How to Prep Your Raw Rice
Once you’ve gathered all your supplies, you need to follow these four steps to grind your flour. This is a detailed prep method you’ll have to follow regardless of the tool or technique you use.
Use at least one cup of raw rice for most of these methods we will discuss later on, except for the flour mill or the pestle and mortar.
Clean and rinse the raw rice
Soak the raw rice
Dry the rice
Grind into flour and store
How to Make Rice Flour Without a Blender?
Here are the quick and easy steps to follow.
Choose Your Rice Grain
The first step is, of course, choose the type of rice you want to grind. White rice and sticky rice flour are commonly used in cooking and baking recipes.
If you’re using brown or black rice, you’ll have to account for extra time to grind it into a fine flour. These are whole grains that contain the bran and are harder than polished white or sticky rice.
Clean and Rinse it
Even packed grains tend to have husk or other visible impurities in them. You don’t want these to end up in the rice flour.
Clean the raw rice well and rinse it in running water or in a pot of water a couple of times to wash away the dirt. Rinsing also helps to remove some of the starch from the rice grains making it easier to grind it.
Soak the Raw Rice
Soaking is an important step in the process of making gluten-free rice flour at home.
Throw away the rinsing water and soak the wet rice in a pot of fresh water for at least an hour. You can even leave brown or other unprocessed rice for four to eight hours or overnight for better results.
How does this help?
You get a softer rice that is easier to turn into fine flour.
Dry the Soaked Rice
When the raw rice has softened enough, you move on the most important step in the entire grinding process.
Drying the rice.
If you don’t dry the rice completely, you’ll most likely end up with a paste rather than a powder or flour.
Drain the water from the soaked rice using a colander. Spread the still wet rice on a muslin/linen cloth or on a baking sheet or large plate.
Let it dry for an hour. Place this in a warm spot or near a table fan to speed up the process.
When there is no moisture left in the rice when you touch it, the rice is ready for the next step.
Grind the Raw Rice
Use one of the chosen tools that we will discuss in the next section to grind the dry rice. You can choose to stop the grinding process depending on the texture you need — coarse, medium-fine, or fine.
For a fine flour, sift the ground rice through a fine sieve. This removes the coarse grains from the fine powder. Not sifting the flour will affect the recipe especially when it comes to rice cakes, dumplings, or even rice rotis or crepes.
How to Make Rice Flour in a Blender
A high-powered blender is what most home cooks and bakers reach for to blend grains into rice. Don’t attempt to grind flour with a cheap blender as you’ll end up damaging the motor.
Add the completely dried rice to the blender and blend on high for 45 seconds. You may have to repeat this process two or three times before you get the desired texture.
If your motor gets heated up, let it cool before continuing the grinding process. Sieve the flour to remove any coarse material before storing.
How to Make Rice Flour With a Food Processor
Another great method to get fine rice powder/flour is the food processor. If you have one at home, use it to grind the dry rice.
Add one to two cups of rice flour to the food processor jar. Close the lid and grind. It takes a few minutes to get the required texture. Mix the ground grains with a spatula and grind again until you get a fine flour.
As food processors aren’t meant for grinding hard grains, it’ll take a bit longer to grind the rice and you may not get a very fine flour.
You may also like: What is the Difference Between a Blender and a Food Processor?
How to Make Rice Flour with a Coffee Grinder

If you don’t own a food processor, then a coffee grinder is a good option to make some fine textured rice flour.
The coffee grinder has a strong motor and thick blades to crush coffee beans into powder. This works well for the thinner and smaller rice grains.
This works best when you use anything from two tablespoons to half a cup of rice. Add the dried rice to the jar. Close the lid and blend at the highest speed for a minute. You’ll need to do two to three turns with frequent breaks to ensure the rice breaks down well and the machine doesn’t overheat.
Before you grind the rice, make sure the jar is clear of any bean residue.
You don’t want strong coffee odors and oils leeching on to your rice flour, do you?
We recommend that you get a separate grinder jar if you’re going to use this appliance to make rice flour regularly.
How to Make Rice Flour with a Spice Grinder
The spice grinder works on the same principle as a coffee grinder. Again, we draw your attention to the need for a clear jar free of any spice residue or odor.
These small grinders are useful when you need a cup of flour, or even less. Adding less quantity will allow the blades to perform better and grind the grains faster. If you add more to the jar the flour will be much coarser than desired.
You need to grind the grains in two to three turns. The rice flour will not be super fine like the store-bought ones. You can always grind for longer and sift with a sieve to get a finer flour.
How to Make Rice Flour With Flour Mill
The flour mill is undoubtedly the best appliance of the lot. This tool is designed for this very purpose. But unless you use different flours in your cooking and baking, and require lots of it, you probably don’t already own one.
With a flour mill you can grind a lot of rice flour at a time. You can grind anything from two to three cups to a whole pound of rice.
As the settings on the dial indicate how coarse or fine you want your flour to be, choose the highest setting for the finest rice flour made at home.
Remember to turn on the grinder before you add the rice grains. Add the rice into the hopper or funnel. The hopper will start grinding the rice as it passes through. The flour deposits in the canister attached to it.
To speed up the process, use a spatula or large spoon to push the rice grains to the center of the hopper. If the rice isn’t not as fine as you’d like it, run the flour through the hopper again, repeating the steps detailed above.
Once the flour mill has finished grinding the rice, switch off the appliance and detach the canister.
Transfer the rice flour to an airtight container or store in multiple glass jars for easy use.
How to Make Rice Flour With Pestle and Mortar

This is the oldest and most time-consuming way to grind rice into flour. The pestle and mortar method requires some serious elbow grease to constantly rotate the pestle and break down the rice grains into smaller pieces.
Use this tool when you want little more than a few tablespoons or a handful of flour.
Add the grains to the mortar and start pounding to break down the grains into smaller chunks. Using a circular motion of the pestle, grind the chunks with a pestle. This traditional method will take quite a while to make the flour.
The resulting rice flour will be much coarse than flour obtained with other tools. You can use this flour as a thickener or for breading.
Discover: Can You Fry Chicken Without Flour? [Full How-To Guide + FAQs]
Can You Make Rice Flour with a Stand Mixer Attachment?
Most stand mixers come with a multi-purpose hub that allows you to add different food attachments including a flour mill and a food grinder.
If you have a high-end stand mixer with this option, use the extra attachments to make rice flour or any other flour for that matter.
Follow the instructions for using the food processor or flour mill attachment to grind rice flour with it.
Check out: Which KitchenAid Mixer is Best For Me?
Final Thoughts
There you have it — different ways to make rice flour at home. A blender or flour mill makes it relatively easy to grind rice at home.
Yet, there are other suitable alternatives, particularly the food processor or the spice/coffee grinder, when you need flour for baking and cooking purposes.
The good old pestle and mortar takes the maximum effort but is useful when you need smaller amounts of rice flour.
Tell us in the comments!
Frequently Asked Questions (FAQs)
Can You Grind Glutinous Rice?
Glutinous or sticky rice is necessary for recipes like mochi, fried rice balls, or other dishes.
You can grind sweet or sticky rice the same way as regular rice using one of the methods we have mentioned.
How to Store Rice Flour?
Add the flour or fine powder into an airtight container and close it tightly. Glass jars, vacuum sealed bags or silicon bags are preferable to plastic or Ziploc containers.
Keep a smaller quantity of this rice flour separate (when grinding a bigger batch) for immediate use in soups, kimchi, sauces, or other recipes.
You can store the flour in a cool, dry place for up to a year. Keep it fresh for longer in the fridge or freezer.

